Inventory - Getting Started
The first steps of enabling and setting up Inventory Management are included
in the documents linked below. If you haven't already, please review these
documents now.
Every inventory item has Master inventory record (Item Details). Initial
creation of these records will be covered later in this document. For now,
please review the screen shot below and the explanation of how each of the
fields are used.
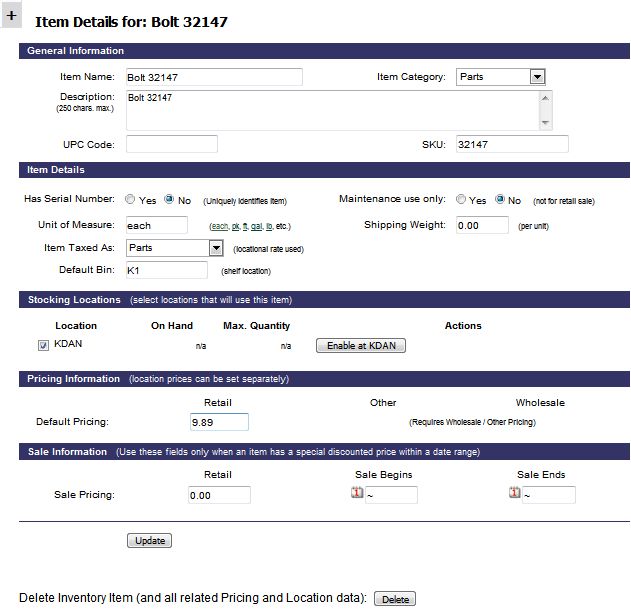
Item Name - A brief description of the inventory item. 30
character maximum length. Item
Name is the only inventory field that shows on service orders and receipts.
Recommended format: Description + Part/Item number (Example: Gasket 1515H3
).
Item Category - Inventory categories are used to sort inventory items into groups for ease of
use.
Description - A more detailed description for internal use. 255
character maximum length. (Example: Rubber Gasket 1515H3
15.5" diameter)
UPC - Universal Product Code is a unique numeric product identifier
used in the United States and Canada. 12 characters and validated by the system
for proper format. Use ONLY for an actual UPC entry. Leave blank otherwise.
Must be unique (cannot match another item�s UPC already in the database).
SKU - Stock Keeping Unit is a unique product identifier provided by the
subscriber. 20 character maximum length. SKU can contain letters, numbers, and hyphens.
Use for SKU or part number. Need to use this if you don't use UPCs, and can
also use in conjunction with UPCs. Must be unique (cannot match another
item�s SKU already in the database).
Has Serial Number - If an inventory item is a part with a serial
number, selecting this option will allow entry of serial numbers each time
an item is received, making it possible to sell and track each item by
serial number.
Maintenance Use Only - If an item is marked Maintenance Use Only,
it can not be sold directly to a customer. The item can only be added to a
service order.
Unit of Measure - The means or quantity in which an inventory item is
packaged. The most frequent unit of measure is 'each'. Other units of measure include quart, gallon, inch, foot, case, and
package.
Shipping Weight - Shipping Weight is simply an informational field.
The data does not appear in reporting. The field exists to estimate or
justify shipping charges passed on to customers.
Item Taxed As - This option is used to apply the proper tax rate
when the item is sold. Options in the drop down correspond to tax rates set
by an Administrator via the Admin Tab / Locations & Taxes menu.
Default Bin - Physical location of an inventory item, like a place on a
shelf in a warehouse or a container in which small items are held (a
"bin"). The purpose is to assist in locating an item, either so you
can find it for a customer or find it when a physical inventory is required.
(Example: Bin1, Shelf2)
Location / On Hand / Max Quantity - Location corresponds to the
airport location where the item is stocked. On Hand is the quantity
currently in stock (from being 'received', which will be discussed later in
this document). Max Quantity is a limit on the quantity of the item that
should be on hand, and works in conjunction with a defined 'order point' to
generate a report of Reorders Required.
Default Pricing - Every inventory item created has a default retail
price. Other & Wholesale prices should be enabled only if you routinely
sell inventory at multiple price points. For example, FBOs with a service
shop may sell certain parts at below retail to a select group of customers,
or may add inventoried parts at a rate of 0 to service orders for internally
owned aircraft. If you have questions about these pricing options, please
enter a support ticket or contact [email protected]
for assistance.
Sale Pricing - An item can be placed 'On Sale' at a discounted rate for a
specified date range.
Once you understand the information contained in inventory records, the next
step is understanding the basic inventory process. Day to day inventory tasks of
creating inventory items and receiving inventory, and the periodic task of
recording physical counts/audits, are accomplished from the Manage Tab / Inventory
Management menu.
Create Inventory Item
An inventory item is created from the Manage Tab / Inventory Management menu.
- Type in the Item Name and select Go.
Remember, Item Name is the only inventory field that shows on service orders and
receipts, so you need to include all the
information that you want the customer to see.
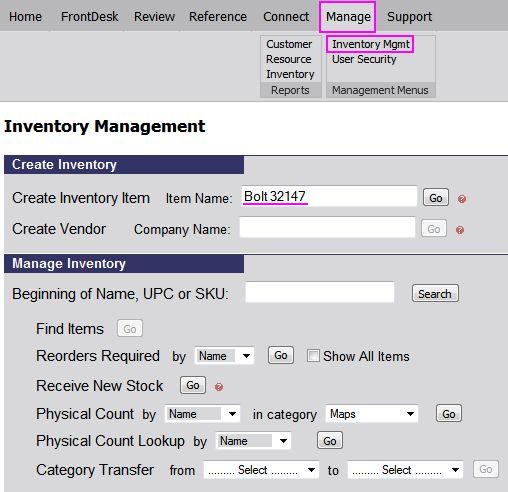
- The system will offer a list of existing inventory
items that may be a match. Pay attention to this list to avoid duplicate
inventory items.
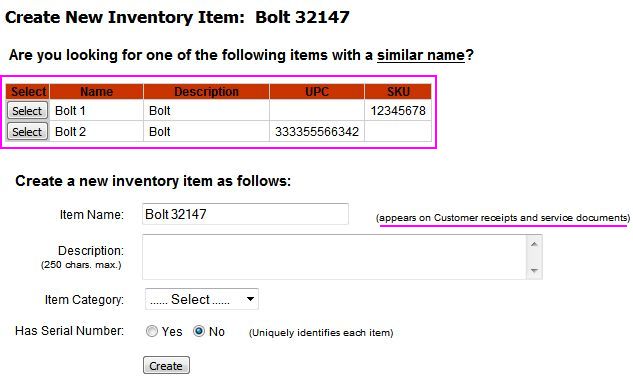
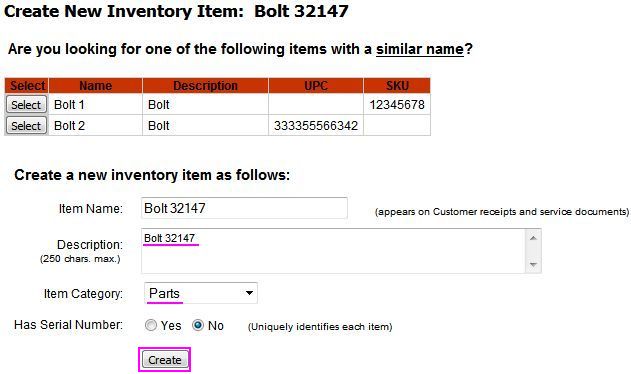
- Add Description (detailed description for internal
use), select Item Category, and select Create.
- The Item Details page appears. Fill out the additional
fields highlighted below. If you do not track an item by UPC, then enter an
SKU (part number, vendor order number, etc.) for tracking. UPC and SKU are
searchable fields used to quickly locate inventory items and for reorder
information.
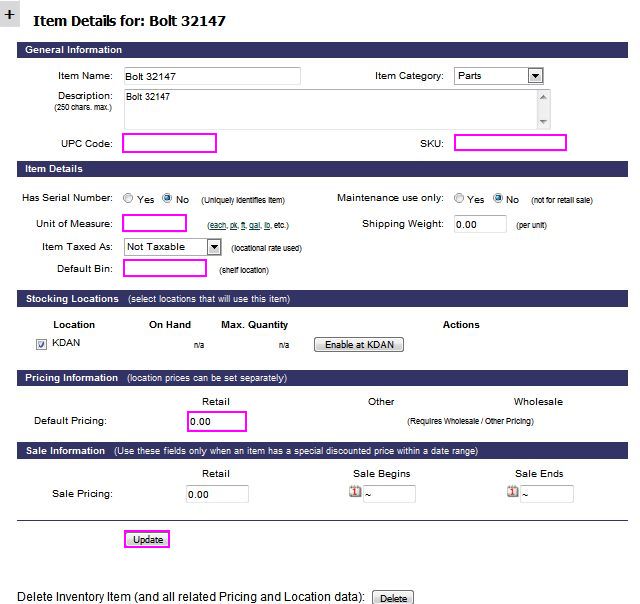
- Here is an example of the Item Details page with data
entry completed.

Receive Inventory
An inventory item is received from the Manage Tab / Inventory Management
menu. Receiving inventory is the process of recording quantities delivered and
the associated cost. Proper receiving is integral to inventory management. If
receipt of inventory is not recorded, Inventory Valuation reports available on
the Manage Tab / Inventory Reports menu are invalid.
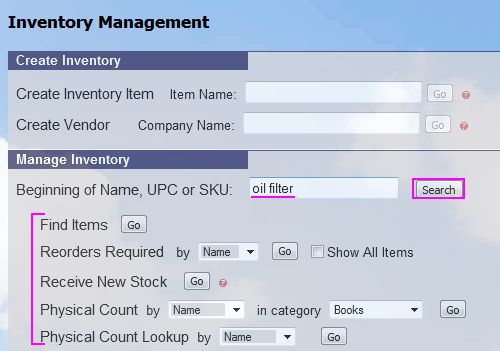
- To receive inventory, you first need to locate the inventory item in the
system. Type in a search term, then select Search. In the example below, the
search is for any Item Name that includes 'oil filter'.
- A list of all matches is returned. Select the appropriate item.
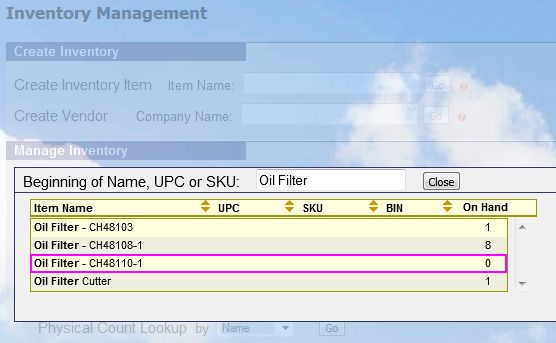
- In the example below, the specific inventory item has been selected.
Select Go to Find Items.
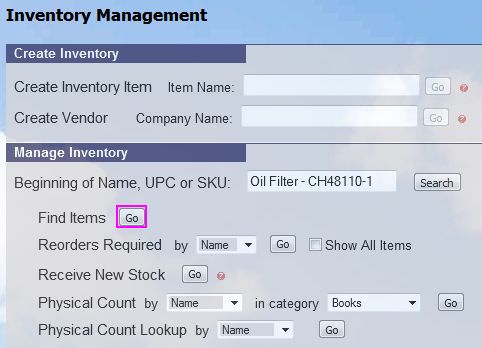
- The familiar Item Details page appears. Note the Receive button mid-page.
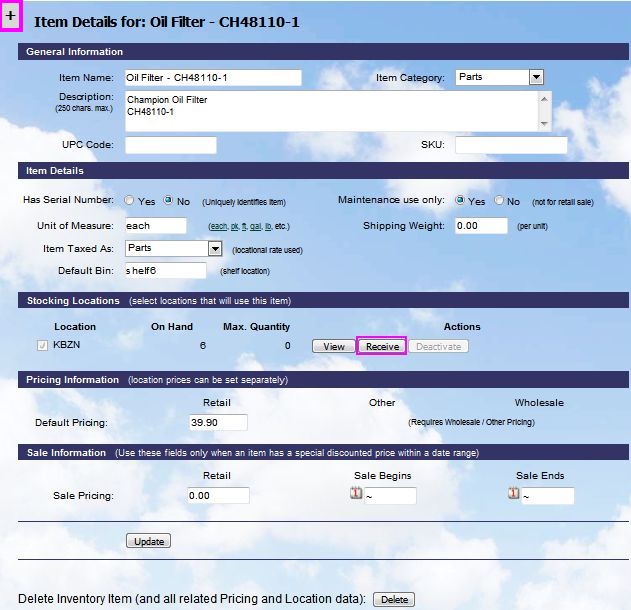
Also note the plus sign in the upper left corner of the screen. This
opens a special side panel menu that allows you to take other actions on
this specific inventory item, including viewing and editing location data
(for systems with multiple locations), recording a physical count on the
item, viewing history of orders received, and viewing (or adding) vendors
associated with the item.
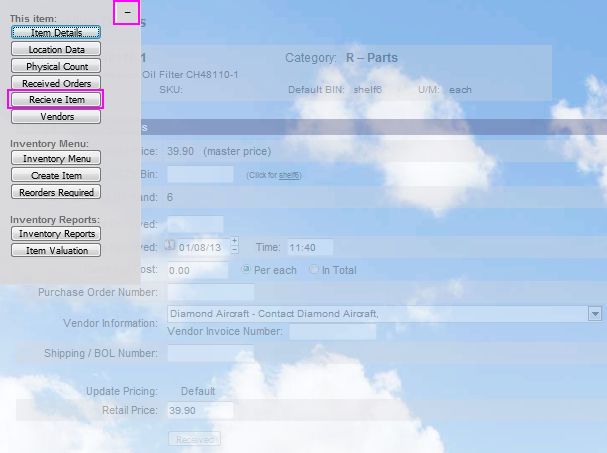
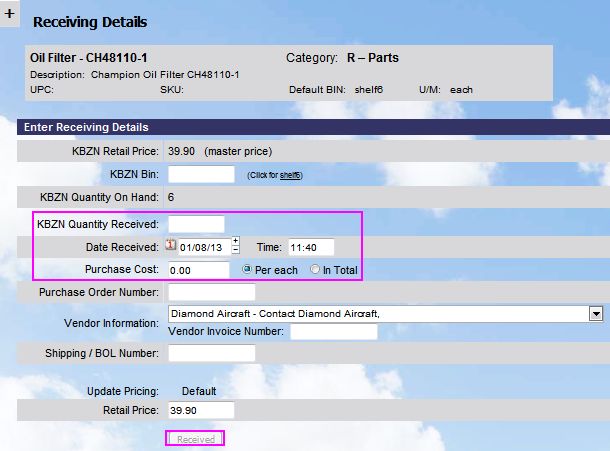
- Regardless of which button you use to Receive, the result is the Receiving
Details screen shown below. At a minimum, enter Quantity Received, Date
Received, and Purchase Cost. Select Received.
Physical Count
All operations have some requirement to periodically perform a physical count
of inventory on hand. The count for a specific item can be updated, the count
for a group of items, or a category of items can be updated, or the count for
all items can be updated. Physical count data is entered from the Manage Tab /
Inventory Management menu
- In the screen shot shown below, 'oil filter' has been entered as a filter,
and then the Physical Count option selected for Any category.
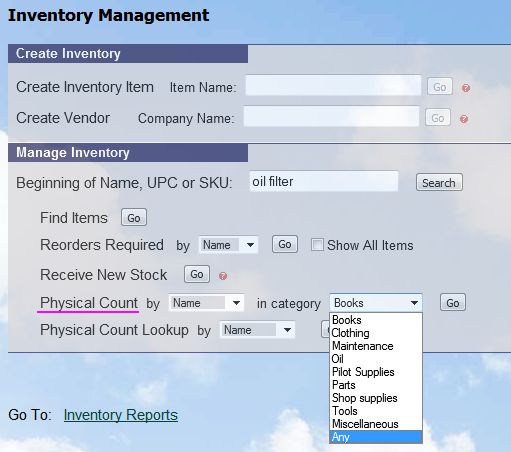
- The result is a list of all items with Oil Filter in the name. Note the
option to enter the new count directly in the report.
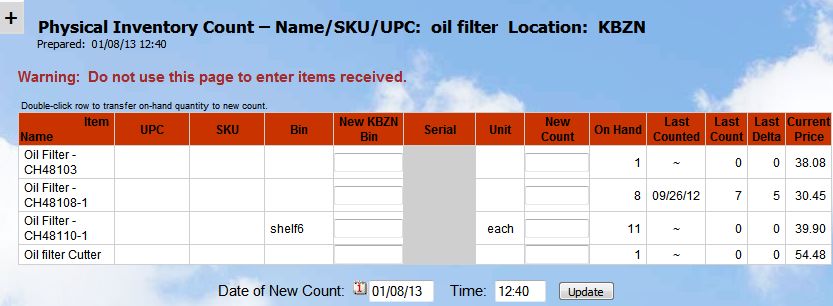
- The typical way to perform an inventory count is to open the Physical
Count report for one category, print the pages for markup by individuals
actually performing the count, and then update the data in MyFBO from the
markup copies.
Physical Count is not a replacement for properly
receiving items; however, in a new system setup, after all initial inventory
items have been created, Physical Count is the proper method to record the
initial quantities on hand.
Mass Entry Options
On occasion, you may have the need to update multiple inventory records at
once. An example of this is an across the board price increase. Options to do
this are available from the Manage Tab / Inventory Reports menu. The 'List'
reports include options to mass edit specific data fields on screen in the
reports. The fields that can be edited are always notated with a gold corner.

List Item Quantities
Includes options to set Reorder Point and Max Quantity to keep on hand.

List Item Pricing
Includes options to update prices and to mark an item for Mx use only.

List Item Descriptions
Includes options to update Item Name, UPC, SKU, and to set Tax rate.

It's fairly common for MyFBO Support to receive requests to bulk change
Item Name entries a few weeks after subscribers start to really use inventory.
Once again, Item Name is the only inventory field that shows on service orders and
receipts, so you need to include all the
information that you want the customer to see.
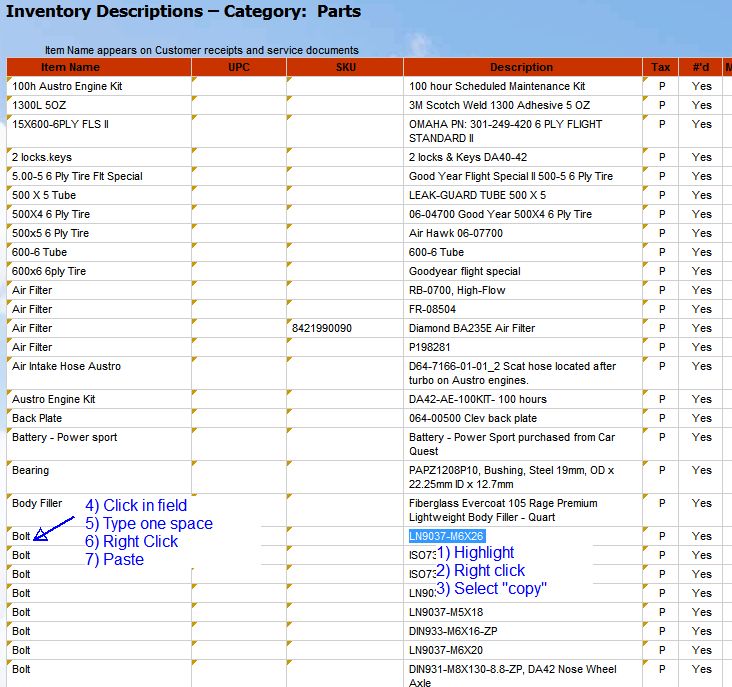
If you hit the situation of needing to move text from one field to
another, you can do so in the List Item Descriptions report using cut and
paste.
List Numbered Items
Includes option to update the Serial number of an item.

01/08/13 cli


