| Veeder Root Integration | Back Forward Print this topic |
See also:
MyFBO Current Rates |
|
Veeder Root EMR3 / MyFBO Integration Instructions
The connection between the Veeder-Root EMR3 DataLink software and MyFBO relies on export files generated by the DataLink software. The export files are processed by a MyFBO script running on your host computer, which uses the MyFBO XML Web Service interface to upload transactions to the MyFBO system server, instantly making the transactions visible in your MyFBO system. This process uses the Windows Task Scheduler, the Windows Scripting Host, and XML Web Services software.
EMR3 is a trademark of Veeder-Root.
Windows is a trademark of Microsoft Corporation.
Veeder Root Import is a chargeable option. Please see MyFBO.com Current Rates for more information.
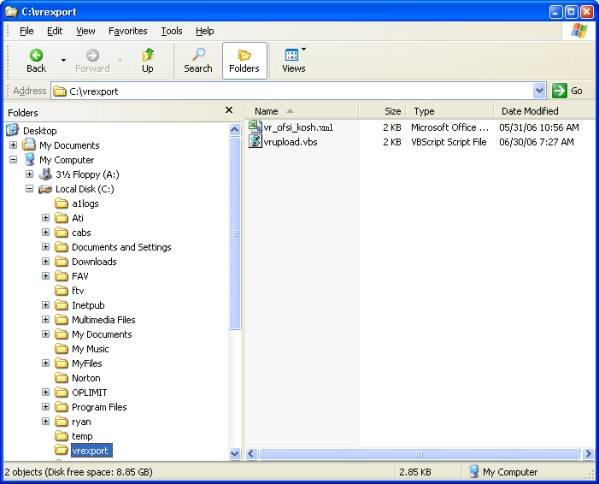
Basic SetupMyFBO recommends that a separate folder be created to hold the DataLink export files and upload software. In the examples that follow, the folder name c:\vrexport has been used.
The visual basic script (VBS) that performs the upload – vrupload.vbs (included in the same zip file as these instructions) – should be copied to this folder.
Configuring the EMR3 DataLink Export
The DataLink software must be configured to provide the export file to be uploaded. This is done at the bottom of the DataLink Configuration page.
A XML file should be exported to the folder created in Basic
Setup above. The file name MUST be as follows:
vr_ for Veeder-Root
xxxx_ the
four-letter MyFBO.com FBO Identifier for your online system
yyyy
the Airport Identifier where the DataLink system
from your online location parameters
.xml the file extension for XML files
For example, the file name for Orion Flight Services Inc. at Whittman
Regional Airport in Oshkosh would be:
vr_ofsi_kosh.xml
Enter the file name on the configuration page as shown below, select “Export to XML” and “Export tickets automatically,” and click the Save button.
Also from the DataLink Configuration page, click Caption to specify the content of the export file. The following page will appear:
At a minimum, you must specify captions for Modem, Head, Ticket, Field #1 (as tail number), Start Total, End Total, Start Time, and End Time. (Other data in the export file is ignored by the MyFBO.com Importer.) You should be using Field #1 to input the Tail Number for the aircraft. Click the Save button when all Captions have been entered.
Configuring the MyFBO Data ImportThe Veeder-Root integration requires the Internal Ground Services reservation type be activated in your MyFBO system. From the MyFBO Admin Tab / Parameters & Settings menu, locate Reservation Types and verify that Internal Ground Services is enabled.
From the MyFBO Admin Tab / Parameters & Settings Menu, locate Ground Services / Fuel section, and check that “Veeder-Root” is active. If not, please contact MyFBO Support before proceeding.
Select “Veeder-Root” and click the Set button. The following page containing Veeder-Root integration parameters will appear:
Enter a username and password with at least 8 characters to be used by the script to upload transactions into your system, enable the Veeder-Root Interface, and click Update. The option to generate a customized upload script will then become active. Enter the Export Folder used in the Datalink configuration above, and click Generate. You will be prompted to download the script named vrupload.vbs. Save this file in your local export folder running the Datalink software, in this example we would save this to C:\vrexport\vrupload.vbs. These parameters allow your computer running the Datalink software to have access to upload the transactions to the online system.
Configuring Fuel Trucks in the Online SystemEach fuel truck with its modem and head data must be entered in the MyFBO database. From the Admin Tab, select Locations-Taxes-Fuel. On the Location Parameters page, click the Fuel Tanks button for the airport where the DataLink system is installed. A list of configured tanks / trucks will be displayed.
If any tanks, trucks, or heads / meters are missing, use the “Add Fuel Tank” box
at the bottom of the page to add them to the online system. Only pre-configured trucks
and heads will be recognized in the data import.
Then for each head included in your DataLink system, use the Edit button to enter the modem and head number in the detail for that tank. In the example below, truck A-17495 has been configured for modem number 10230 and head 1.
When a second head is used on a truck / modem, it must be specified as Head 2 and the tank for head 1 must be selected in the drop-down box at the bottom of the page. This allows the online system to track tank quantities even when there are two meters.
Scheduling the File UploadThe Windows Task Scheduler is used to initiate the visual basic script that performs the upload. You may schedule the process to run as frequently as you like to ensure transactions are quickly entered in the online system; we recommend a minimum one-minute interval.
To schedule the upload, open the Windows Control Panel and select Scheduled Tasks. Then click Add Scheduled Task. The Scheduled Task Wizard asks which program you want to run.
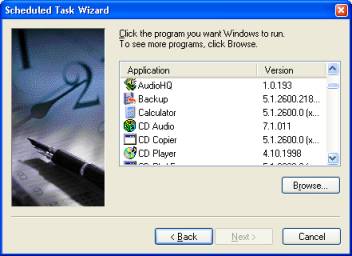
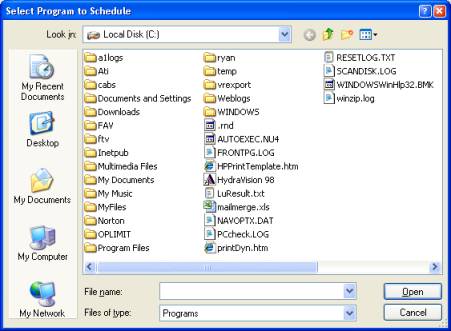
Click the Browse button and navigate to the folder created above – c:\vrexport in this example.
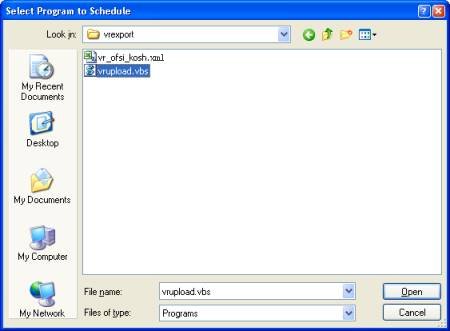
Select the upload script and click Open.
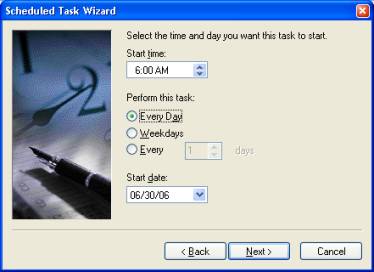
The Scheduled Task Wizard will then ask when you want to run this program. In this example, 6:00 a.m. every day has been selected as the start time. Click the Next button.
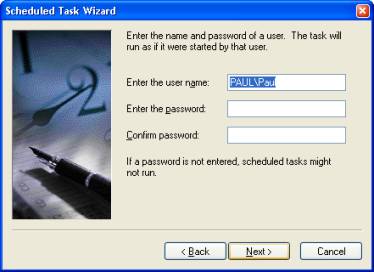
Your system may then ask for security information as shown below. If this is requested, enter the appropriate codes for a system administrator and click the Next button.
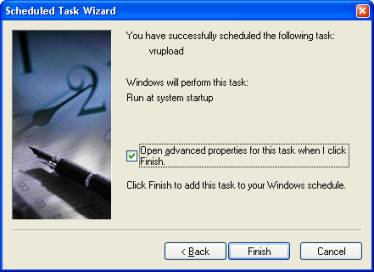
On the last page of the Scheduled Task Wizard, select Open Advanced Properties and click the Finish button.
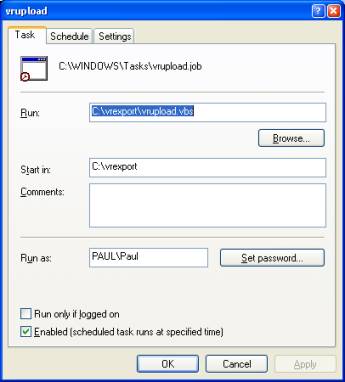
The advanced properties window will then open as shown below. Click the Schedule tab.
On the Schedule tab, click Advanced.
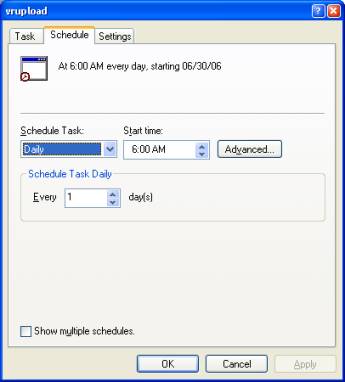
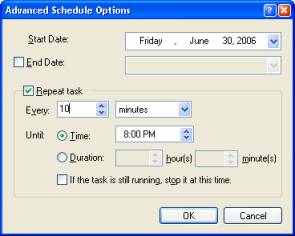
On the Advanced Schedule Options window, select Repeat Task and enter a frequency and ending time. A ten-minute frequency and an ending time of 8:00 p.m. have been used in this example. Then click OK.
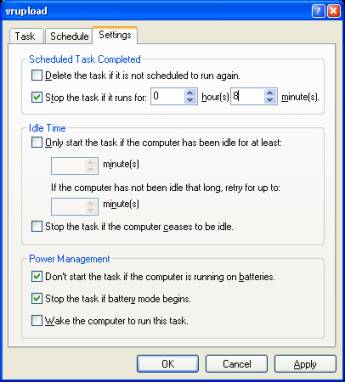
Back on the advanced properties window, click the Settings tab and enter a stop time for the upload. This number should be equal to the frequency entered above. The upload should take no more than one minute to complete. Click OK to complete task scheduling.
First Use
It may be necessary to manually start the upload task on its first use. Open the Windows Control Panel and select Scheduled Tasks. On the Scheduled Tasks window, right click the upload process (vrupload) and click Run.
If your computer has anti-virus software, that software may object to the upload script. Please authorize the script to run.
The ProcessIf an export file has been created by the DataLink software, the upload visual basic script operates as follows:
| Copyright © MyFBO.com [email protected] |
06/03/10 jgs (updated to XML web service interface)
03/01/12 cli veeder